Introduction
Scanned PDF files are superb for display and storing purposes, but they cannot be altered as the contents are images instead of editable text, and this can make some computer users frustrated when working with them. Fortunately, a quick PDF conversion tool – Advanced Scan to PDF Free can help you edit the scanned image document before saving to PDF.
Step 1. Activate Scanner
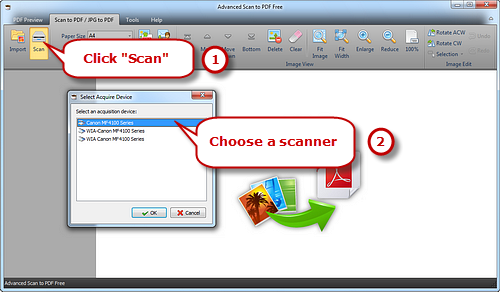
Launch Advanced Scan to PDF Free and place your document on the scanner bed. Be sure it is as straight as possible. Click “Scan…” to choose a scannerconnected to your computer and activate the scanner program.
Step 2. Scan the Document
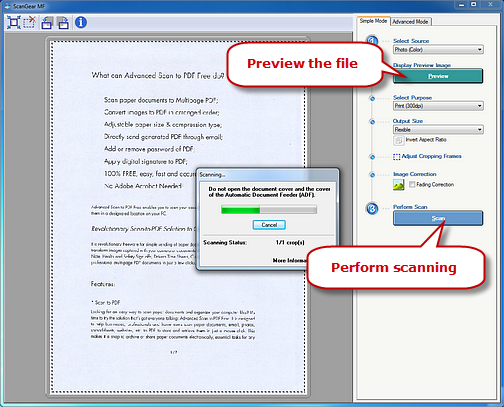
You may click “Preview” to see the image to be scanned. Then click “Scan” to perform scanning.
Step 3. Edit Image
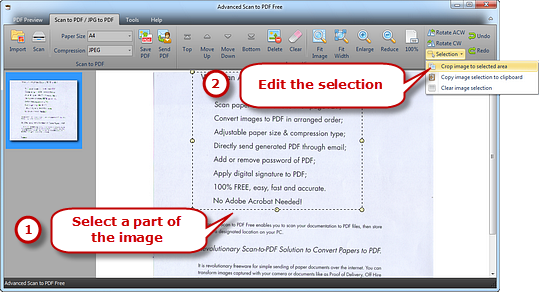
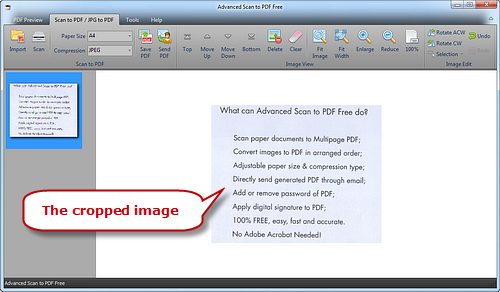
Several seconds later, the image is scanned to the program window. Drag from the upper left corner of the image to the lower right corner to select a part of the image. Then, click “Selection” to edit the image:
Crop image to selected area – allows you to cut out any portion of the image you don’t like or make an image smaller.
Copy image selection to clipboard – allows you to paste the selection to any place as needed.
Clear image selection – remove the selection border.
Step 4. Save Edited Image to PDF
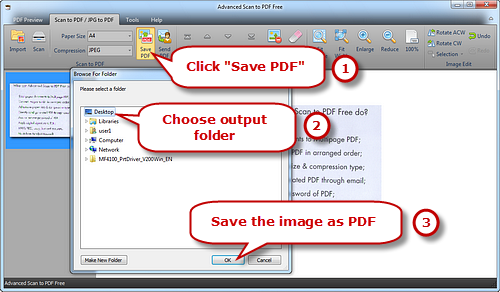
Select Page Size (A0-6, B5, Letter (8.5″ × 11″), Legal (8.5″ × 14″), ledger (17″ × 11″)) and Compression (RLE, G3Fax, G4Fax, JPEG). Click “Save PDF” to choose the output folder and then “OK” to save the scanned document as PDF.
